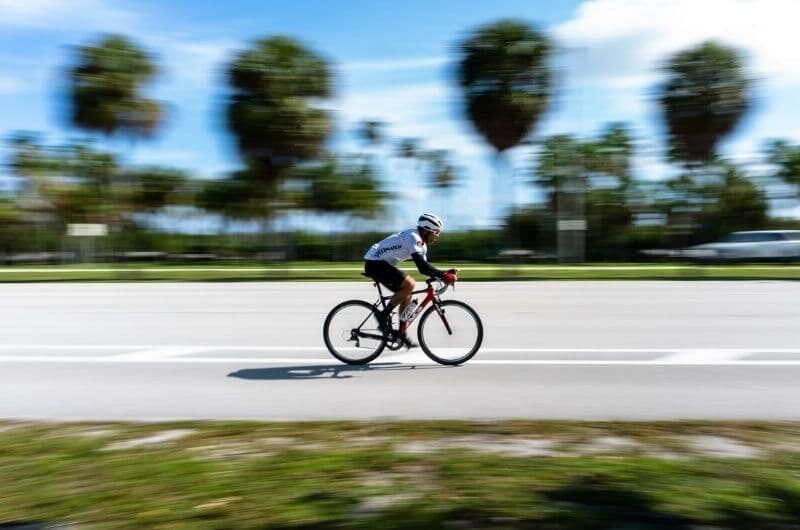
There are moments in a cyclist’s life that fill all of the senses. The excitement and speed of a long straight downhill. The dread when you scan the horizon, knowing the road you’re on is the only one around, and it’s going up and up. Seeing the lights of an open café, when you really need a break, or some food.
These moments are a response to how you might be feeling on a ride, and often catch you unawares. However, there are ways you can plot and plan a way to find the places that inspire these feelings. Or avoid them!
It’s a little bit old-school these days to set off for a ride without knowing your route in advance. There’s safety and security in knowing what’s ahead of you. Even a simple, recalled memory of sights and turns along a route helps.
Before the advent of cycling computers, or cycling navigation apps, preparation for a ride might take the form of stuffing a map into your pocket. Or in my case, writing the names of villages and towns en-route onto a piece of paper, and sticking it onto my top tube!
Relying on local authorities to provide adequate signage is not recommended. This is especially true in areas you don’t have much knowledge of. Technology can now provide a cyclist with the information and data necessary to plan and enjoy routes. This ensures a ride that’s free of stress and uncertainty.
Riding on holiday, either in your own country or abroad, is also improved by having the comfort of knowing where you’re going. We no longer need to rely on rudimentary planning, or paper maps!
Of course, regardless of the navigation method you choose, you should always make sure you’re prepared in advance.

How to Plan Bike Routes
One of the most important things is to know your limits. Have a think about your physical condition, and state of mind. Think about the capacity of the bicycle you’re riding. This is all crucial to making the best of the route.
Have you checked the weather forecast for the full distance? Do you know if there are trains running nearby, if needed? Should you take a spare phone charger?
Safety considerations and preparation are vitally important. This is not only for your peace of mind, but for successfully planning the ride itself. There’s a lot to be said for sitting down well in advance of a ride at your desk and planning, even though looking at a PC monitor might not feel like the beginning of an adventure!
Having a clear picture of where you’re planning to go is improved by utilising the mapping applications your computer or smartphone offers. When engineering your route, take in as much information as possible before setting off, or transferring the route to your cycling navigation app, or cycling computer.
A little bit of research works wonders. If you have time, type the route into google to find out what others think of cycling in the area. Make notes of key areas to explore, coffee-break stops, and potentially fun (or exhausting!) parts of the route.
A browse on YouTube could reward you with on-board camera shots of hills, trails, or terrain. This can help you determine how exposed they are. It pays to do this level of planning. Most cycling navigation apps also have a live-tracking feature, so friends and family can keep an eye on your progress.
How Do I Find the Best Cycling Route?
Using a variety of online tools, and combining them into one plan, will provide you with some of the best routes and maps. Google Maps, Komoot, MapMyRide, Strava, Ride with GPS, Ordnance Survey Maps, and Sustrans (in the UK) are great sources of previously ridden routes.
Remember that one route planning app doesn’t necessarily hold sway over the others. Different cycling navigation apps could give you a new nugget of information to note down, allowing you to improve and/or edit parts of the route.
Maybe you’re focused on roads used for speed, or by professional athletes. Or perhaps your aim is off-road or leisurely pursuits. There are cycling navigation apps to suit all preferences, and most have editing functions which take into account your ability, biking style, or desire for a decent lunch!
Using the best parts from a variety of cycling navigation apps to help you plan your route is worth the effort.

How Do You Know Which Cycle Route is Safe?
Research and planning are your friends here. A grasp of mapping is really helpful to identify the grading of a road, its surface, and the contour lines (which help to identify the gradient). Knowing the road-surface, and quality of the terrain are essential. Google Street View is a real bonus here.
On opening most cycling navigation apps, the application’s databases, as well as pre-existing routes provided by other users, can give you an increased awareness of the realities of the route.
If you’re unsure what lies ahead, think about the worst case scenario. This could be the risk of injury to yourself, or the possible mechanical failure of your bicycle. Remember, there’s always the chance you may not have a phone signal, or battery, to help you out of an unknown area, or one with no visible landmarks around.
Heatmaps, contained within some applications, are a good indicator of how cycle routes are used by others. This can provide you with crucial additional information.
Bear in mind there’s a risk that the heatmap on a route might have been chosen for its difficulty. This may be more true for off-road sections.
Best Free Cycling Route Planner + Navigation Apps
The convenience of effective GPS (Global Positioning Systems) can take some pressure off your planning. Smartphones and cycling computers can be synced up, and secured to the handlebars of your bicycle to provide guidance. It’s not recommended to use the device with headphones, however. This is to ensure the safety of yourself, and those around you.
Less time spent at junctions deciding which way to turn means more time for enjoying your ride! Some cycling navigation apps allow you to calculate how long you might be out on the road, which makes life easier when it comes to your diary, social life, and family commitments.
Google Maps is a reassuring place to start. It’s a route planner we’re all familiar with, and ideal for a commute, or recreational road-ride.
Free route planners are increasingly being chipped away at, and turned into subscription services. However, the essential elements of cycling navigation apps with ‘in-app purchase’ options are often still free, and can be re-planned on a free application, then synchronised with a smartphone or cycling computer.

1) Komoot
Komoot was born in 2009. It uses the open source OpenStreetMap database for mapping.
The app overlays its own algorithm to emphasise features of interest, such as point to point climbs created by other users. The helps you establish the best route, based on the type of bicycle you’re riding, and the waypoints you select.
Is Komoot Any Good?
The range of activity types, and fitness levels, in conjunction with the database of information from existing users, makes Komoot a wide-ranging app to suit riders of all levels of experience. It’s very easy to use, and actually quite addictive when planning!
Desktop and mobile versions are available. Navigation can be done via the screen, and the speaker, or earpiece. The details of surfaces in existing routes is a really useful feature for those who like to ride on mixed surfaces. It’s of particular use to gravel riders, who can use their bicycle for multiple terrains.
Care is required however. There are segments that make their way onto the gravel classification, but are better suited towards mountain bikes, and worse, electric mountain bikes. I say worse because the gradients here would force most riders to get off and walk.
Some roads automatically chosen by the app may also be on the busy side. This is why it’s well worth checking the route (on a computer if possible) beforehand with a fine-tooth comb. You can easily divert from high classification roads, while still retaining the other aspects of the ride you’d like to include. Mountain bike routes on the app are designed to be as off-road as possible.
The gradient and surface type options can be edited down to sections, so that you can avoid the ‘smoothing out’ process.
Having clearly established gradient types will also help you if you’re riding in an unknown area!
Unsuitable segments can be chopped out, and replaced with a surface that suits your bicycle, mood, or the weather. The gravel section is a treasure trove of tracks and paths which are completely off-grid, providing you with exciting alternative routes.

The mapping and navigation can also be used offline, and the voice guidance (created in-house) is very good. The routing is elementary at present, but has improved as more subscribers and users save their rides.
It’s worth mentioning that very occasionally, the off-road routes can lead you on to unpaved public footpaths. I’m talking about the kind of public paths that have stiles, and a grass track!
You’ll have to be patient with the app until you’re used to its quirks. You can rule out trying to achieve record route times or speeds initially.
Is Komoot Route Planner Free to Use?
In order for Komoot to work for you, the mapping must be unlocked. You get one free region when you sign up. Subsequent regions cost £3.99. If you’re located in the middle of a region, this will be to your advantage. However, you’re likely to pay more if you’re on the fringes of two areas.
Bundles of collected, adjoining regions are available for £8.99. Alternatively, you can opt for a worldwide package. Additional regions are a welcome addition to any cycling holiday, and remember that your package can be expanded to include walks, hiking, and cycle touring.

What Are the Benefits of Komoot Premium?
The features offered by Komoot Premium, available on a subscription-basis, are multi-day planning, discounts on products, and planning features for extended riding packages. The World Pack is also available. All existing features of the maps function work with Komoot Premium.
The full outdoor package costs £59.99 as an annual subscription, or £4.99 if billed monthly.
Multi-day planning lets you create tours for all skill levels, including accommodation suggestions, routes reviewed by riders, a summary of the expected hours you’ll be riding per day, and the expected metres of climbs per day. Detours are included, and can be made en-route.
The Personal Collections feature lets you catalogue specific rides by region, for filing for personal use, or for sharing.
Weather, and sport-specific mapping features help reduce the margins for error.
Komoot Premium also unlocks discounts for you on cycling gear. At the time of writing, over 100,000 products are on offer at discounted prices. The current promotions are on offer with Bikester and Campz.
When it comes to Komoot, worldwide maps and navigation, plus live tracking, builds a complete package for you – and those who want to follow every turn of your wheels.
How Do I Plan a Route on Komoot?
(All speech bubbles the author’s own)
Step 1 – Planning the Route
Planning can be done via a PC or smartphone. After entering your start and finish waypoints, the blue line will indicate the most appropriate routing. Once you have this template on screen, you can click any points of interest, specific rides, or the red discs which have been entered by other riders, to find out more.
The app will give you the option to include them on the route. Any points of interest created by the community of riders using the app will usually have a bio, and images attached.
Step 2 – Waytypes and Surfaces
This view allows you to gauge the surfaces you’re going to be riding on. It’s useful in identifying the specifics of the route, and when the application will guide you onto a cycleway, as opposed to the road.
If you have a preference for roads over cycleways, you can edit the screen here by clicking on the blue line, and making the minor adjustments necessary to move the line.
If you know the roads you are travelling on, you could leave this setting. The guidance from the speaker, or your headphones, will tell you when it senses you’ve veered off course. Distance in metres is provided by the voice software, for example, “route begins left in five hundred metres”. It also tells you when you’re back on course.
Step 3 – Points of Interest.
Simply click onto these to add the POI of your choice.
Step 4 – Summary
The app will create a summary on the webpage, ready to be sent to a smartphone app, or to a third-party device.
For information, here’s an image from the smartphone app mid-route.
2) Garmin Cycling Route Planner
Garmin Connect is the platform used by the company as its database and homepage for route users. Dashboards, challenges, calendars, newsfeeds, activities, and reports are all included. Like many route-planning apps, the interface is moving towards a social media, virtual room style.
User data entered on social platforms is of great value to all of the companies mentioned in this article. Route planners rely greatly on rider data to move users towards bike-friendly routes.
The Garmin Connect application has a smartphone app too. The main intent here is synchronisation with a Garmin device.
Does Garmin Have Navigation for Cycling?
The navigation tool preferred by Garmin would be one of their own devices. Routes can also be set to be added automatically if they’ve been created via third-party services.
You can synchronise with Garmin Connect via your PC if this is where the route is saved, or alternatively, the route can be sent to a compatible device. This can be transferred via a .GPX file or .FIT file.
How to Plan a Cycling Route on Garmin
Step 1 – Open Garmin Connect
Click through Training/Courses/Create a Course. You can then decide whether you want to share your location with Garmin.
Step 2 – Choose a Course Type
You can choose from Road Cycling, Mountain Biking, or Gravel/Unpaved Cycling. Next, choose the drawing method from either a custom built route, or a round trip.
If you choose a round trip, you enter a distance and start direction from the points of a compass. You can then add a course point onto it. There are general points such as food, water, first aid and danger, as well as cycling specific points like climbs, or sprints. An elevation and pace calculator is also provided.
With the Custom Drawing option you can choose to follow popular routes as ranked by the Garmin community, follow exiting roads, or ‘draw’ a route freehand.
Step 3 – Create Your Route
Scroll through the map to locate your start point. You can also enter a postcode to narrow down the search, then use the +/- zoom function to narrow in. You can choose from a satellite or map view. As you start to narrow in, heatmaps will show roads coloured in increasingly deeper shades of purple, which are the most popular routes cycled by other Garmin users.
The Google Maps bike lanes tool is overlaid in green too. We’ve switched to a Map view to highlight this in the image below. The Google Maps bike lanes tool is less visible when planning your route via a smartphone.
Your course can then be saved for synchronisation with a relevant device.
3) Google Maps for Cycling
Straightforward, helpful, and free, Google Maps helps millions of journeys to go a little more smoothly. The software syncs well between devices, and the voice direction is very good. However, there are challenges when it comes to bicycle routes in terms of their popularity with other road users.
How Do I Create a Cycling Route on Google Maps?
(We’ll be looking at using Google Maps via a smartphone for simplicity and efficiency – assuming that the phone will be attached to the handlebars once the ride begins)
Step 1 – Go to Google Maps
The application, depending on Location Services being enabled, will centre in on where you are with a blue dot. You can touch the screen to centre in on the start point, or enter the address or postcode details.
Step 2 – Enter the Route Directions
Remember to choose the bicycle icon for your proposed destination. You can then toggle through the options offered – the shortest time taken is usually the default, which the map is set to. There are options for satellite and terrain, as well as cycle routes.
Step 3 – Preview Your Route
Route preview offers you the chance to look at the specifics of the ride. This can help with identifying dual carriageways, or what look like busy A-roads.
Clicking on the layer icon in the top right hand corner opens up the mapping detail, and clicking ‘traffic’ will give real-time information on how busy the route is. Remember, this will be specific to the time of day you’re looking at the smartphone, by default.
For information, here’s a mid-route screenshot using the Google Maps app.
Is Google Maps Good for Cycling?
The rate at which Google offers updates and product improvements bodes well for cyclists. Discerning cyclists are at home in cities, and the wealth of data Google obtains is of great help in this environment. The advanced algorithm and real-world conditions add to the usefulness of the app.
However, remember that when it comes to the roads chosen by the algorithm, at times there may be quieter routes available. In the example above, the 8 minute slower route takes in a dedicated 5kms of cycleways, some of which are segregated by a kerb. The left turn of the fastest route pushes you into bus lanes, and A-roads.
4) Strava Route Planner
As well as offering one of the largest social networks for cycling fans, the Strava app is well known for having segments – portions of road or trail created by members, where cyclists can compare times. We’re entering into the world of Lycra here, record-making locations known for precise start and finishing points, or record times achieved by the kings and queens of the mountains.
The Strava route planner builds on these segments, and you can add or remove them according to your wishes. Strava’s origins are in road-cycling, and although it has developed itself (and its subscription services) to cover all sports, the legacy of road cycling remains embedded in these segments.
The basic operating principles are similar to the other cycling navigation apps we’ve covered. You create the route, save it in your profile, then navigate the route via your smartphone application or other appropriate device.
The route creation is available for PC as a subscription-only package. You can view previously saved routes on the free service.
Route creation includes trail names, elevation guides, and information about the surface type. The Segment Explore options allows for micro-assessment of the routes.
Does Strava Have Turn-by-Turn Navigation?
The navigation is limited to a blue line on the application’s map. Strava doesn’t offer audible directional navigations. Strava segments are displayed on the map also.
How Do I Follow a Route on Strava?
Once you’ve downloaded the free application onto your smartphone, simply save and select your route, then click the orange start button once you’ve found the GPS signal.
Is Strava Good for Navigation?
The Strava application has the most elementary capabilities of the apps we’ve covered when it comes to route planning and navigation. These aspects are better left to the other cycling navigation apps we’ve looked at. The road-riding community element dominates the cycling aspects of the application.
As this service has moved to subscription-only, outside of any free trials, this is a feature that the developers will need to stay on top of to keep paying customers satisfied – so it may be worth keeping an eye on future updates.
Komoot vs Garmin vs Google Maps vs Strava [Bike Route Planning]
| Komoot | Garmin | Google Maps | Strava |
| Offline navigation feature | Millions of users’ frequently used roads built in to planning | Can add stops along the way rather than just ‘point-to-point’ | Millions of users’ segments data available en route |
| Off-road friendly, adventure-seeking | Can switch between users’ routes and main roads | Turn-by-turn directions trusted and well-rehearsed and includes StreetView images (check compatibility of smartphone) | Part of subscription only package |
| Finds conventional road routes | Phone and web options available | Quick-click links to cycle paths and trails used in the area | Routes can be exported to a device |
| Mapping functionality clear and intuitive | Not the most easy to use compared to others | Toggle between elevation features – the quickest route in minutes may not be the easiest route | Global Heatmap, surfaces and elevation guides helps planning |
What is the Best Map App for Cycling?
It’s a difficult one to call! There’s the convenience of Google Maps, the segments and heatmaps of Strava and Garmin, or the micro-planning abilities of Komoot. All are working on their integration and synchronisation, so you may find that using a combination of apps works best for you.
That being said, for all-round accessibility on the PC, and visualisation of new and different routes, Komoot edges it for an advance-planning nerd like me.
(all prices accurate at the time of writing)
The post Best Cycling Navigation Apps [Safe Route-Planning Guide] appeared first on Discerning Cyclist.
![Best Cycling Navigation Apps [Safe Route-Planning Guide]](http://bicycle.org/wp-content/uploads/2022/03/cyclist-scenic-countryside-760x504.jpg)